Thursday, December 13, 2007
procedures in installing windows vista
1. Boot your computer system using the Windows Vista Upgrade DVD. You may have to set your BIOS to boot from DVD first, as the 1st boot device if it hasn’t been setup before.
2. Then click on the “Install Now” button.
3. You will be prompted to enter a Product Key. Do not enter one - leave it blank.
4. You will be prompted to select the Vista product version you wish to install. Do so now.
6. The installation should proceed normally for Vista. Installation time is quicker then previous versions of Windows.
7. Upon completion of the installation process, you must restart the installation once again from within Vista. And you must select to do a in-place upgrade. This time you will enter your Product Key when asked.
procedures in installing windows 98
Copy all of the files from the win98 directory on the Windows 98 CD to a directory on your hard disk and install from your hard disk
Install directly from the CD
Although, I understand Microsoft frowns on the procedure, I prefer the first method for installing Windows 98 on my own hard disk drive. I use the second method when installing Windows on a customer's hard disk. The first method installs faster and every time Windows needs new software or driver from the Windows 98 CD, it will first go to the directory on the hard disk from which it was installed and install the software from there instead asking that you insert the CD. This saves me from having fish-out the Windows 98 CD every time I install new software and hardware, which is often. The advantage of the second procedure is that it saves about 120 MBytes of hard disk space, if in the first method, you leave the files on the hard disk after installation. Furthermore, with the first method, you may still need the CD for some drivers not found in the win98 directory.
Ok, let's install Windows 98:
Method 1
Make a c:\windows\options\cabs directory and copy the files from the win98 directory on the CD-ROM to the cabs directory.
a:\> c:
c:>md windows
c:>cd windows (or simply type cd followed by the F3 key)
c:\windows>md options
c:\windows>cd options
c:\windows\options>md cabs
c:\windows\options>cd cabs
c:\windows\options\cabs>copy d:\win98\*.*
Where d: is your CD-ROM drive.
The c:/windows/options/cabs directory was a convention established with the standard installation some of the OEM (Original Equipment Manufacturer) versions of Windows 95. You could copy the win98 directory to any desired directory on your hard disk and install from there, but I continue to use the convention so I can remember where the cab files are located.
Cab or cabinet files are files containing one or more compressed files. Most of the Windows 98 files are in cab files on the CD.
Install Windows 98.
c:\windows\options\cabs>setup /ie
The /ie flag tells Windows 98 not to make a new Startup Floppy during the installation.
Method 2
Change to the win98 directory on the Windows 98 CD and run setup.exe.
a:\> d:
where d: is your CD-ROM drive letter.
d:\> cd win98
d:\win98 > setup /ie
Do not run setup from d:\. There is a setup.exe there, but it won't work with this procedure.
Just follow the Windows 98 installation prompts. If setup asks you for a directory in which to install Windows, make sure you tell it to install it in c:\windows (not d:\windows or c:\windows.001, etc.).
If you have moved Windows 3.x to the new drive or if you have the old drive attached with Windows 3.x or 95 on it, the upgrade should install ok. If not, setup will say it can't find an old version of Windows to verify before installing the upgrade. It will then allow you to browse to a drive/directory where the old version of Windows is located. If you have Windows 3.x or 95 on floppy, remove your Startup Floppy, if it is still in A:, insert floppy 1 of the old version of Windows in the floppy drive and point setup to the floppy drive. If you have the old version on CD, remove the Win 98 CD, insert the old Windows CD, and point setup to d:\, where d: is your CD-ROM drive. I have found that setup won't always find what it is looking for the first time you point it at the drive containing the old version of Windows. Point again; you may have to do it several times, but it should eventually take. When verifying Win 3.x floppies, setup will check several of them. I counted five the last time I did it. (The Win 95 upgrade only checks the first one.)
After installation, you may want to install you CD-ROM software on your hard disk drive so you can use it from a direct boot-up to the DOS prompt. Boot to the DOS by holding the Ctrl key as the computer boots or pressing the F8 key just as Windows 98 starts and install form the manufacture's floppy. You may have to boot with the Startup Floppy to install the software from a CD-ROM or install it from Windows. There are many variations. If the installation program asks for the location of the mscdex.exe file, it is located in the c:\windows\command directory.
Likewise, after installation you may have to reinstall the DOS (real mode) software for your sound card, especially older ISA sound cards.
installation in windows 2000
2. Hit ENTER to install Windows 2000.
3. Hit C to continue.
4. Hit the F8 key to agree to license agreement.
5. Hit D to delete any existing disk partitions.
6. Hit C to create new partition.
7. Hit ENTER to accept the default (one big partition.) Note there may be some space left over. That’s OK.
8. ENTER to install windows on this partition.
9. ENTER to format the partition as NTFS.
10. Wait while the drive is formatted, files copied from the CD. The machine will reboot itself.
11. ENTER to accept locale and keyboard settings.
12. Type computer name and school name in the appropriate slots, hit ENTER.
13. Type the computer name. Type the Administrator password TWICE. Password will show as all asterisks. ENTER.
14. Modify the date, time and time zone as needed. ENTER.
15. Click to select “Custom settings”. ENTER.
16. Click to remove the check next to “File and Printer Sharing for Microsoft Networks”. ENTER.
17. Leave “This computer is not on a network or is on a network without a domain” selected (or if a PDC is available, selected the domain option). Type EPAHS in the Workgroup (or Domain) field. ENTER.
18. Remove CD from drive. ENTER. Computer will reboot. ENTER.
19. Select “User must enter a user name and password to use this computer.” ENTER. ENTER again.
20. Log into computer as Administrator, using the password you entered in step 13. ENTER.
21. Disable the WELCOME Screen.
22. Double-click the “Connect to the Internet” icon on the desktop. Select “I want to set up my Internet connection manually, or I want to connect through a local area network (LAN).” OK.
23. Select “I connect through a local area network (LAN).” ENTER. ENTER again.
24. Select NO to setting up email. OK. OK again.
25. Right-click on “My Network Places”. Click Properties.Right-click on “Local area network”. Click Properties.Click on “Internet Protocol (TCP/IP)” so that it turns blue. Click Properties.Select “Use the following IP address”.Type in the IP address, subnet mask, gateway and DNS addresses you wrote down before. Click OK.
26. Change the Resolution (by right clicking on the desktop and selecting Properties:24 bit True Color800 x 600Advanced -> Adapter -> Refresh Rate -> 75 HzYES ... OK ... OK ... OK ... (Joe Pesci mode)Now adjust monitor physical wheels as needed.
27. Set the ScreenSaver to show the computer name:Right-click on desktop, select Properties-> Screensaver Tab-> Text = “PC01 Welcome To EPAHS PC01”-> Speed = Medium-> Location = Random-> Font = Terminal-> Size = 72-> Wait = 10 minutes-> Color = your choiceEnergy Saver: Turn off monitor after 30 minutes
Tuesday, December 4, 2007
Windows XP Installation and Procedures
If your computer can boot from CD-ROM then you can perform the following steps to install Windows XP:
1. Start your PC and place your Windows XP CD in your CD/DVD-ROM drive.
2. Your PC should automatically detect the CD and you will get a message saying "Press any key to boot from CD".
3. Press a key to boot from CD and Windo
ws setup will begin. Windows will start copying preliminary setup files to your computer.
4. You will be asked if you want to perform a new installation, repair an existing installation, or quit. In this case, you will be performing a new installation.
5. You will be presented with the End User Licensing Agreement. Press F8 to accept and continue.
6. Select the partition where you want install windows. You will have the opportunity to create and/or delete partitions or just allocate the available disk space to one partition.
7. The next screen asks if you wish to use the NTFS file system. This is the recommended file system. If you choose to use FAT32, you will not have all the security and stability features of Windows XP.
9. The setup program will automatically start copying files after the partition is formatted and you will see a setup progress bar.
10. After this is complete the computer will restart. Leave the XP CD in the drive but this time DO NOT press any key when the message "Press any key to boot from CD" is displayed. In few seconds setup will continue.
11. Windows XP Setup wizard will guide you through the setup process of gathering information about your computer.
12. Choose the region and language.
13. Type in your name and organization.
14. Enter your product license key.
15. Name the computer, and enter an Administrator password. Don't forget to write down your Administrator password.
16. Enter the correct date and time.
17. Choose workgroup or domain name.
18. Register Windows XP if you've installed all the current hardware on your machine.
Tuesday, November 20, 2007
Windows 95
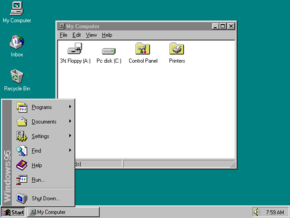
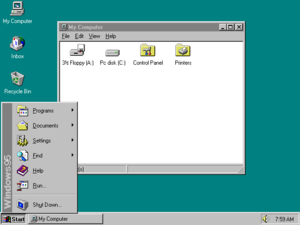
Windows 95 was intended to integrate Microsoft's formerly separate MS-DOS and Windows products and includes an enhanced version of DOS, often referred to as MS-DOS 7.0. It features significant improvements over its predecessor, Windows 3.1, most visibly the graphical user interface (GUI) whose basic format and structure is still used in later versions such as Windows Vista. There were also large changes made to the underlying workings, including support for 255-character mixed-case long filenames and preemptively multitasked protected-mode 32-bit applications. Whereas its predecessors are optional "operating environments" requiring the MS-DOS operating system (usually available separately), Windows 95 is a consolidated operating system, which was a significant marketing change.
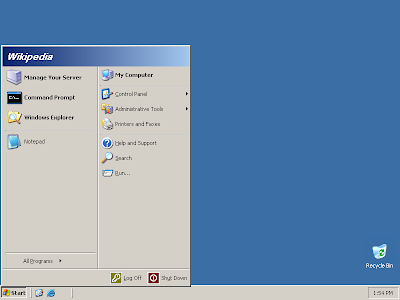
Windows 2003
Windows Server 2003 is a server operating system produced by Microsoft. Introduced on April 24, 2003 as the successor to Windows 2000 Server, it is considered by Microsoft to be the cornerstone of their Windows Server System line of business server products.
According to Microsoft, Windows Server 2003 is more scalable and delivers better performance than its predecessor, Windows 2000.
Sunday, November 18, 2007
Windows Vista
Windows Vista contains hundreds of new and reworked features; some of the most significant include an updated graphical user interface and visual style dubbed Windows Aero, improved searching features, new multimedia creation tools such as Windows DVD Maker, and completely redesigned networking, audio, print, and display sub-systems. Vista also aims to increase the level of communication between machines on a home network using peer-to-peer technology, making it easier to share files and digital media between computers and devices. For developers, Vista includes version 3.0 of the .NET Framework, which aims to make it significantly easier for developers to write applications than with the traditional Windows API.
Microsoft's primary stated objective with Windows Vista, however, has been to improve the state of security in the Windows operating system.[4] One common criticism of Windows XP and its predecessors has been their commonly exploited security vulnerabilities and overall susceptibility to malware, viruses and buffer overflows. In light of this, Microsoft chairman Bill Gates announced in early 2002 a company-wide "Trustworthy Computing initiative" which aims to incorporate security work into every aspect of software development at the company. Microsoft stated that it prioritized improving the security of Windows XP and Windows Server 2003 above finishing Windows Vista, thus delaying its completion.[5]
Windows Vista is the target of a number of negative assessments by various groups. Criticisms of Windows Vista include protracted development time, more restrictive licensing terms, the inclusion of a number of new Digital Rights Management technologies aimed at restricting the copying of protected digital media, lack of device drivers for some hardware, and the usability of other new features such as User Account Contro
:Linux..

Apart from the fact that it's freely distributed, Linux's functionality, adaptability and robustness, has made it the main alternative for proprietary Unix and Microsoft operating systems. IBM, Hewlett-Packard and other giants of the computing world have embraced Linux and support its ongoing development. Well into its second decade of existence, Linux has been adopted worldwide primarily as a server platform. Its use as a home and office desktop operating system is also on the rise. The operating system can also be incorporated directly into microchips in a process called "embedding" and is increasingly being used this way in appliances and devices.
Throughout most of the 1990's, tech pundits, largely unaware of Linux's potential, dismissed it as a computer hobbyist project, unsuitable for the general public's computing needs. Through the efforts of developers of desktop management systems such as KDE and GNOME, office suite project OpenOffice.org and the Mozilla web browser project, to name only a few, there are now a wide range of applications that run on Linux and it can be used by anyone regardless of his/her knowledge of computers. Those curious to see the capabilities of Linux can download a live CD version called Knoppix . It comes with everything you might need to carry out day-to-day tasks on the computer and it needs no installation. It will run from a CD in a computer capable of booting from the CD drive. Those choosing to continue using Linux can find a variety of versions or "distributions" of Linux that are easy to install, configure and use. Information on these products is available in our distribution section and can be found by selecting the mainstream/general public category.
Windows 9x
Windows XP
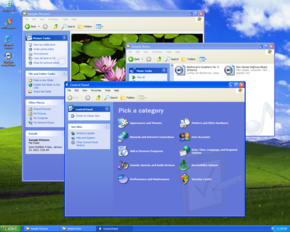 Windows XP is a line of operating systems developed by Microsoft for use on general-purpose computer systems, including home and business desktops, notebook computers, and media centers. The letters "XP" stand for eXPerience.[2] It was codenamed "Whistler", after Whistler, British Columbia, as many Microsoft employees skied at the Whistler-Blackcomb ski resort during its development. Windows XP is the successor to both Windows 2000 Professional and Windows Me, and is the first consumer-oriented operating system produced by Microsoft to be built on the Windows NT kernel and architecture. Windows XP was first released on October 25, 2001, and over 400 million copies were in use in January 2006, according to an estimate in that month by an IDC analyst.[3] It is succeeded by Windows Vista, which was released to volume license customers on November 8, 2006, and worldwide to the general public on January 30, 2007.
Windows 2000
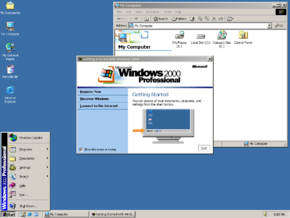
At the time of its release, Microsoft marketed Windows 2000 as the most secure Windows version they had ever shipped,[6] however it became the target of a number of high-profile virus attacks such as Code Red and Nimda. More than seven years after its release, it continues to receive patches for security vulnerabilities on a near-monthly basis.
Windows NT 3.1
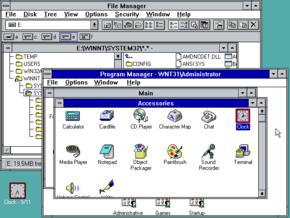
It could run on Intel x86, DEC Alpha, and MIPS R4000 CPUs.
Windows 98..

The first edition of Windows 98 is designated by the internal version number 4.10.1998, or 4.10.1998A if it has been updated with the Security CD from Microsoft. Windows 98 Second Edition is designated by the internal version number 4.10.2222A, or 4.10.2222B if it has been updated with the Security CD from Microsoft. The successor to Windows 98 is Windows Me.
OS/2 Warp
Windows Operating Systems//MS-DOS
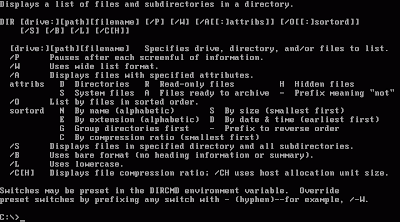
A full time operating system was needed for IBM's 8086 line of computers, but negotiations for the use of CP/M on these broke down. IBM approached Microsoft's CEO, Bill Gates, who purchased QDOS from SCP allegedly for $50,000. This became Microsoft Disk Operating System, MS-DOS. Microsoft also licensed their system to multiple computer companies, who used their own names. Eventually, Microsoft would require the use of the MS -DOS name, with the exception of the IBM variant, which would continue to be developed concurrently and sold as PC-DOS (this was for IBM's new 'PC' using the 8088 CPU (internally the same as the 8086)).[1]
Tuesday, November 13, 2007
Monday, November 12, 2007
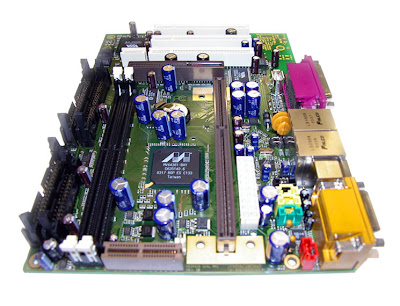
MOTHERBOARD
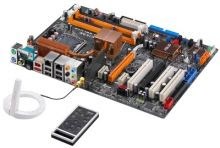 AT or ATX? (yes, there are some AT P2 boards). Intel BX, LX, or a non-Intel chipset based board? 5 PCI / 2 ISA or 4 PCI / 3 ISA?
Overclocking friendly, or stability as the overriding factor?
Those questions notwithstanding, the two most popular BX boards are the Abit BH6 and Asus P2B. That's one person's opinion, and I'm sure you'll hear more. One of the "neater" features of these two boards is the ability to run a 66MHz FSB P2 (eg. P2-300 and P2-333) at the 100MHz FSB setting.
With Intel® Core™2 Duo processor, you'll experience revolutionary performance, unbelievable system responsiveness, and energy-efficiency second to none. And, you won't have to slow down for virus scan, multiple compute intensive programs, or multimedia downloads—these desktop processors are up to 40 percent faster with improved energy-efficiency.¹
With Intel Core 2 Duo processors powering your desktop and laptop PCs you'll get the latest arsenal of performance-rich technologies, including up to 4MB of shared L2 cache, up to 1333 MHz front side bus for desktop, and up to 800 MHz front side bus for laptop, you've got the future of computing now, and only from Intel:The Intel Core 2 Duo processor-based desktop PC was designed from the ground up for energy efficiency, letting you enjoy higher performing, ultra-quiet, sleek, and low power desktop PC designs. The Core 2 brand refers to a range of Intel's consumer 64-bit dual-core and MCM quad-core CPUs with the x86-64 instruction set, and based on the Intel Core microarchitecture, which derived from the 32-bit dual-core Yonah laptop processor. (Note: The Yonah had two interconnected cores, similar to those branded as Pentium M, but comprising a single silicon chip or die.) The 2x2 MCM quad-core CPU (dual-die dual-core[1]) had two separate dual-core CPUs (dies) - next to each other - in one quad-core MCM package. The Core 2 relegated the Pentium brand to a lower-end market, and reunified the laptop and desktop CPU lines divided into the Pentium 4, D, and M brands.
The Core microarchitecture returned to lower clock speeds and improved processors' usage of both available clock cycles and power compared with preceding NetBurst of the Pentium 4/D branded CPUs[2]. It translated into more efficient decoding stages, execution units, caches, and buses, etc, reducing the power consumption of Core 2 branded CPUs, while enhancing their processing capacity.
The Core 2 brand was introduced on July 27, 2006[3] comprising of the Solo (single-core), Duo (dual-core), Quad (quad-core), and Extreme (dual- or quad-core CPUs for enthusiasts) branches, as of 2007[4]. The Core 2 branded CPUs include: "Conroe" and "Allendale" (dual-core for higher- and lower-end desktops), "Merom" (dual-core for laptops), "Kentsfield" (quad-core for desktops), and their variants named "Penryn" (dual-core for laptops), "Wolfdale" (dual-core for desktops) and "Yorkfield" (quad-core for desktops). (Note: For the server and workstation "Woodcrest", "Clovertown", and "Tigerton" CPUs see the Xeon brand[5].)
The Core 2 branded processors featured the Virtualization Technology (except T5500 or lower end E4x00), Execute Disable Bit, and SSE3. Their Core microarchitecture introduced also SSSE3, Trusted Execution Technology, Enhanced SpeedStep, and Active Management Technology (iAMT2). With a Thermal Design Power (TDP) of up to only 65 W, the Core 2 dual-core Conroe consumed only half the power of less capable, but also dual-core Pentium D-branded desktop chips[6] with a TDP of up to 130 W[7] (a high TDP requires additional cooling that can be noisy or expensive).
Typically for CPUs, the Core 2 Duo E4000/E6000, Core 2 Quad Q6600, Core 2 Extreme dual-core X6800, and quad-core QX6700 and QX6800 CPUs were affected by bugs, but these were apparently minor
SLOTS
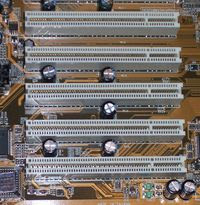
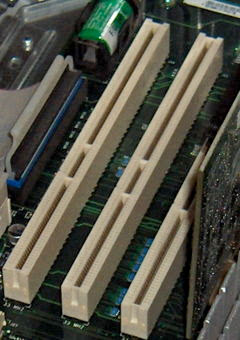
An integrated circuit fitted onto the motherboard itself, called a planar device in the PCI specification.
An expansion card that fits into a socket.
The PCI bus is common in modern PCs, where it has displaced ISA and VESA Local Bus as the standard expansion bus, but it also appears in many other computer types. The bus will eventually be succeeded by PCI Express from 2004 and onwards.
The PCI specification covers the physical size of the bus (including wire spacing), electrical characteristics, bus timing, and protocols. The specification can be purchased from the PCI Special Interest Group (PCI-SIG). Version
Card
32-bit, 33MHz (added in Rev. 2.0)
64-bit, 33MHz (added in Rev. 2.0)
32-bit, 66MHz (3.3V only, added in Rev. 2.1)
64-bit, 66MHz (3.3V only, added in Rev. 2.1)
Slot
32-bit, 5V (most common on desktop mainboard)
32-bit, 3.3V (rare)
64-bit, 5V (less common, but can also be found on earlier server mainboard)
64-bit, 3.3V (most common on server mainboard before PCI-X appears)
Devices are required to follow a protocol so that the interrupt lines can be shared. The PCI bus includes four interrupt lines, all of which are available to each device. However, they are not wired in parallel as are the other traces. The positions of the interrupt lines rotate between slots, so what appears to one device as the INTA# line is INTB# to the next and INTC# to the next. Single-function devices always use their INTA# for interrupt signaling, so the device load is spread fairly evenly across the four available interrupt lines. This alleviates a common problem with sharing interrupts.
PCI bridges (between two PCI buses) map the four interrupt traces on each of their sides in varying ways. Some bridges use a fixed mapping, and in others it is configurable. In the general case, software cannot determine which interrupt line a device's INTA# pin is connected to across a bridge. The mapping of PCI interrupt lines onto system interrupt lines, through the PCI host bridge, is similarly implementation-dependent. The result is that it can be impossible to determine how a PCI device's interrupts will appear to software. Platform-specific BIOS code is meant to know this, and set a field in each device's configuration space indicating which IRQ it is connected to, but this process is not reliable.
PCI interrupt lines are level-triggered. This was chosen over edge-triggering in order to gain an advantage when servicing a shared interrupt line, and for robustness: edge triggered interrupts are easy to miss. However, this efficiency gain comes at the cost of flexibility, and one interrupting device can block all other devices on the same interrupt line. (See "level-triggered interrupt" for explanation.)
Later revisions of the PCI specification add support for message-signalled interrupts. In this system a device signals its need for service by performing a memory write, rather than by asserting a dedicated line. This alleviates the problem of scarcity of interrupt lines. Even if interrupt vectors are still shared, it does not suffer the sharing problems of level-triggered interrupts. It also resolves the routing problem, because the memory write is not unpredictably modified between device and host. Finally, because the message signaling is in-band, it resolves some synchronization problems that can occur with posted writes and out-of-band interrupt lines.
PCI Express does not have physical interrupt lines at all. It uses message-signalled interrupts exclusively.
an electronic memory device; "a memory and the CPU form the central part of a computer to which peripherals are attached"
computer storage, memory board, store, memory, storage
computer, computing device, computing machine, data processor, electronic computer, information processing system - a machine for performing calculations automatically
computer hardware, hardware - (computer science) the mechanical, magnetic, electronic, and electrical components making up a computer system
memory device, storage device - a device that preserves information for retrieval
non-volatile storage, nonvolatile storage - computer storage that is not lost when the power is turned off
fixed storage, read-only memory, read-only storage, ROM - (computer science) memory whose contents can be accessed and read but cannot be changed
real storage - the main memory in a virtual memory system
register - (computer science) memory device that is the part of computer memory that has a specific address and that is used to hold information of a specific kind
scratchpad - (computer science) a high-speed internal memory used for temporary storage of preliminary information
virtual memory, virtual storage - (computer science) memory created by using the hard disk to simulate additional random-access memory; the addressable storage space available to the user of a computer system in which virtual addresses are mapped into real addresses
volatile storage - computer storage that is erased when the power is turned off.


